About
Lightweight swiss-knife-like VPN client to multiple VPN service providers
Install the Big Bear CasaOS App Store
Commit
Introduction
Starting the Container: When you begin using this docker container, it won’t function properly right away.
Configuration Needed: To make the container operate correctly, you have to provide it with certain pieces of information, known as “environment variables.” These variables are required to tailor the container’s behavior to your particular VPN provider.
VPN Providers
Step 1: Go to the GitHub page that lists all the vpn providers that gluetun supports. The URL is: gluetun-wiki/setup/providers at main · qdm12/gluetun-wiki · GitHub.
Step 2: Once you are on this GitHub page, look for the section that contains environment variables for
your VPN Provider.
Step 3: After identifying the environment variables you need from the GitHub page, open your CasaOS container settings. To do this, click on the vertical dots (represented by ···) as shown in the image.

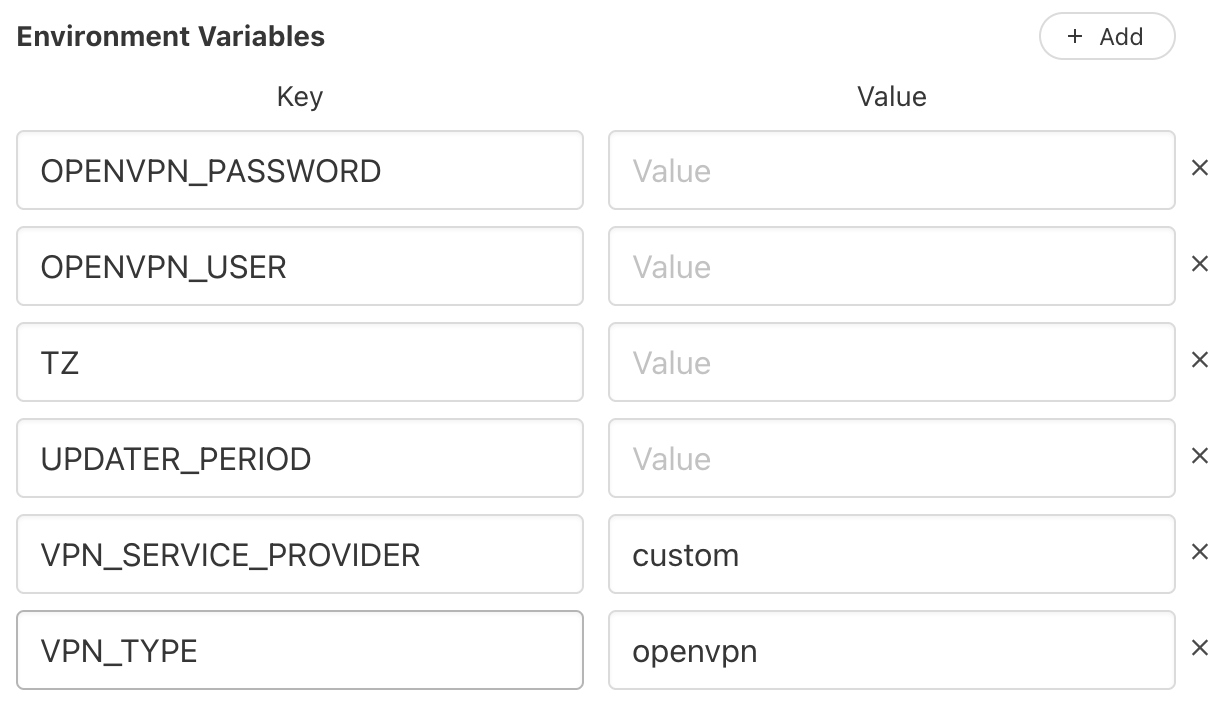
Step 4: In the CasaOS container settings, you will see fields or options where you can enter environment variables. These fields are where you should add the environment variables you found on the GitHub page.
Step 5: Enter the environment variables one by one, providing the values as needed based on the information from the GitHub page.
Step 6: After you have entered all the required environment variables with their corresponding values, press the “Save” button or equivalent. This action will save the changes you’ve made to the container settings, including the new environment variables you added.
Setup network_mode
- Container in the Same docker-compose.yml:
- In this scenario, you have multiple containers defined within the same
docker-compose.ymlfile. - To connect a container to the network stack created by the “gluetun” container, you should add the line
network_mode: "service:gluetun"to the configuration of the second container. - There’s no need to use
depends_onin this case because the network connection is explicitly specified usingnetwork_mode.
- External Container to Gluetun:
- In this scenario, you have an external container (not defined in the same
docker-compose.yml) that you want to connect to the “gluetun” network stack. - When launching the external container, you should use the
--network=container:gluetunflag. This tells Docker to use the network stack of the “gluetun” container for the new container, assuming that the “gluetun” container is already running.
- Container in Another docker-compose.yml:
- In this scenario, you have another
docker-compose.ymlfile that defines containers, and you want to connect one of those containers to the “gluetun” network stack. - To achieve this, you should add the line
network_mode: "container:gluetun"to the configuration of the container in your separatedocker-compose.ymlfile, provided that the “gluetun” container is already running.
In all three scenarios, the goal is to allow containers to share the network stack created by the “gluetun” container, enabling them to communicate or access resources through that network. The specific configuration differs depending on whether the containers are in the same docker-compose.yml, external, or in another docker-compose.yml.
CasaOS
- Access the Host: You need to access the host system where CasaOS is running. This typically involves logging into the host system.
- Navigate to the App Directory: Once you’re on the host system, you use the command
cd /var/lib/casaos/appsto change your current directory to the location where CasaOS stores its applications. This is the directory where you can find the configuration files for the applications. - Locate Your App: Inside the
/var/lib/casaos/appsdirectory, you need to navigate to the directory of the specific CasaOS app for which you want to make changes. Replace[your-app]in the command with the name of the app you want to modify. - Edit the Docker Compose Configuration: After you’ve navigated to the app’s directory, you use the command
nano docker-compose.yamlto open the Docker Compose configuration file for that app in the Nano text editor. Docker Compose is a tool for defining and running multi-container Docker applications. - Make Changes and Save: Within the Nano text editor, you can make any necessary changes to the Docker Compose file. Once you’ve made your changes, you can save the file by pressing
CTRL + O(this writes the changes), then press Enter (to confirm the file name), and finallyCTRL + Xto exit the editor.
Save changes
- Access the CasaOS UI: First, you need to open or access the CasaOS user interface. This typically involves opening a web browser and navigating to the CasaOS web application.
- Find the Vertical Dots: Inside the CasaOS UI, look for a menu or interface element that consists of three vertical dots aligned vertically (···). These dots are often used as an indicator that there are more options or settings available for a specific item.
- Open Container Settings: Click on these vertical dots next to the container or item for which you want to access settings. This action should open a menu or panel with various options related to that container. Click on Settings.
- Press Save: Within the container settings menu or panel, there should be an option labeled “Save” or something similar. Click on this option to save any changes or configurations you’ve made to the container settings.
Script
Testing
Check the Container Logs: You can check the logs of the Docker container to see if there are any errors or if it has connected successfully to the VPN service.
docker logs <container_name>
Replace <container_name> with the name or ID of your Gluetun container. Look for messages that indicate a successful connection or any errors that need to be resolved.
- Check the public IP address from within the Gluetun container. You will execute a command in the container that makes an HTTP request to
ifconfig.me, which will respond with the public IP address that the request originated from.To do this, run:
docker exec <container_name> curl ifconfig.me
Replace <container_name> with the actual name of your Gluetun container. If the output IP address is different from your actual public IP address, and it corresponds to the IP range of the VPN provider you are using, then it indicates that Gluetun is correctly routing your container’s traffic through the VPN.
Check the IP Address: After Gluetun has established a VPN connection, your IP address should change to the address provided by the VPN. You can check this by running a command within the container that fetches your public IP.
docker exec <container_name> wget -qO- http://ipecho.net/plain
This command will return the public IP address that the container is using. Compare this to your actual public IP address to see if it has changed.
Check for DNS Leaks: To ensure that DNS queries are also going through the VPN, you can perform a DNS leak test.
docker exec <container_name> curl https://dnsleaktest.com
This command will output the HTML of the DNS leak test website, and you can look for your public IP address and DNS server information to ensure they match what’s expected from the VPN provider.
Check for /dev/net/tun
When using VPN applications like Gluetun inside a Docker container, the /dev/net/tun device is indeed required to be available on the host machine. It’s the host’s kernel feature that Docker containers utilize for creating tunneled network interfaces for VPN connections. The container needs access to this device to create VPN tunnels.
Here’s how you can check if /dev/net/tun exists on your host:
- Directly on the Host:
- Open a terminal on your host machine.
- Run the following command:
ls -al /dev/net/tun
If /dev/net/tun is available, you should see an output similar to this:
crw-rw-rw- 1 root root 10, 200 Jan 1 00:00 /dev/net/tun