Could you post the errors that you’re getting?
The mounted volumes have no permissions in Casa OS LXC.
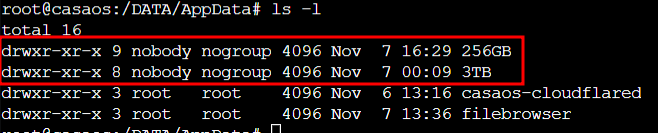
I cannot give ownership to root and I cannot make directories in those mounted drives.
When I try to make a directory or install an app in the Casa OS GUI, nothing happens at all and I believe it’s related to this permissions issue.
Thanks!
Some errors from the cli below:

When you see nobody and nogroup as the owners of a directory or file within an LXC container, it typically means that there is a mismatch between the user IDs (UIDs) and group IDs (GIDs) on the host system and those inside the container.
-
User/Group Mismatch: The UIDs/GIDs on the host do not correspond to any valid user/group inside the container. This is common when UID/GID mapping is used for containers.
-
Permission Restrictions: The directory on the host has permissions that are too restrictive, preventing the container’s users from writing to it.
-
To find the UID and GID for a specific user, you can use the
idcommand followed by the username. For example:
id username
This will give you an output like this:
uid=1000(username) gid=1000(usergroup) groups=1000(usergroup),...
Once you know the UID/GID that you want to have ownership inside the container, you can change the ownership on the host to match:
# Change to the UID/GID that corresponds to your container's user/group and the /mnt/data if needed.
sudo chown -R 1000:1000 /mnt/data
Replace 1000:1000 with the UID:GID that you need. The UID and GID should be the values that the container’s processes use.
I get uid = 0 (root) gid =0 (root) group=0 (root).
The mounted drives have the proper permissions on the host:
root@pve:/mnt/pve# ls -l
total 8
drwxr-xr-x 9 root root 4096 Nov 7 16:29 NVME_256GB
drwxr-xr-x 8 root root 4096 Nov 7 00:09 SATA_3TB
Change Ownership to Match Container’s Mapped UID/GID
You can change the ownership of the mounted directories to match the mapped UID/GID of the container’s root user:
- Find Mapped UID/GID: First, find out what UID/GID range is mapped to the container. This information is usually in the container’s configuration file located at
/etc/pve/lxc/<vmid>.conf. Look for lines starting withlxc.idmap. - Change Ownership on Host: Use the
chowncommand on the host to change the ownership of the directories to match the container’s mapped UID/GID.
For example, if the mapped UID for root in the container starts at 100000, you would do:
chown -R 100000:100000 /mnt/pve/NVME_256GB
chown -R 100000:100000 /mnt/pve/SATA_3TB
I finally got the right permissions and can read/write/execute now. phew!
I had to find the id range to map and then once I did that in the vmid.conf it worked like a charm.
What a pain!! lol!
This was the mapping that worked for me:
lxc.id_map: u 0 100000 65536
lxc.id_map: g 0 100000 65536
I also did the chown -R 100000:65536 to the mounted directories on the host like so:
chown -R 100000:65536 /mnt/pve/NVME_256GB
chown -R 100000:65536 /mnt/pve/SATA_3TB
Once I did that the container would start up again and I was able to create and delete directories on those volumes /DATA/AppData/256GB and /DATA/AppData/3TB.
Issue resolved!
When I tried 100000:100000 it would not boot. I read that this mapping may not work if you have a lot of containers and that is likely the culprit to it not working since I have multiple.
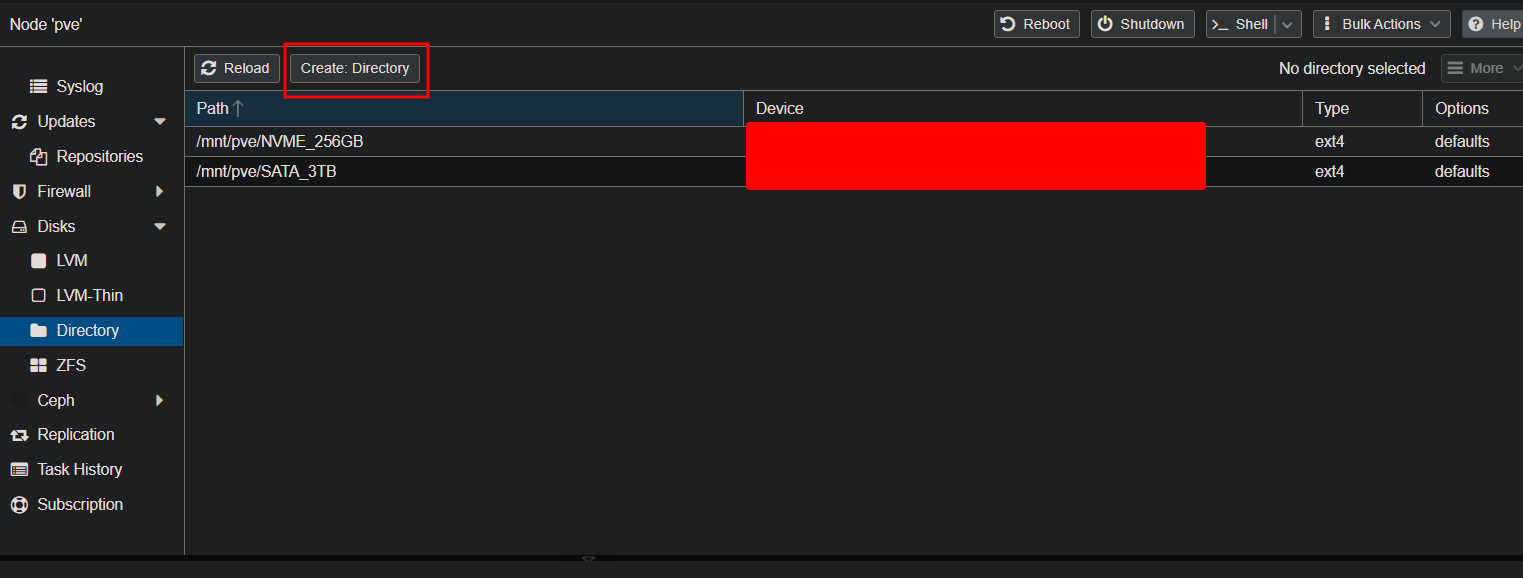
One thing I would like to note about this is that most of this stuff can be done on the GUI with proxmox outside of the lxc.idmap and the chown permissions change I think.
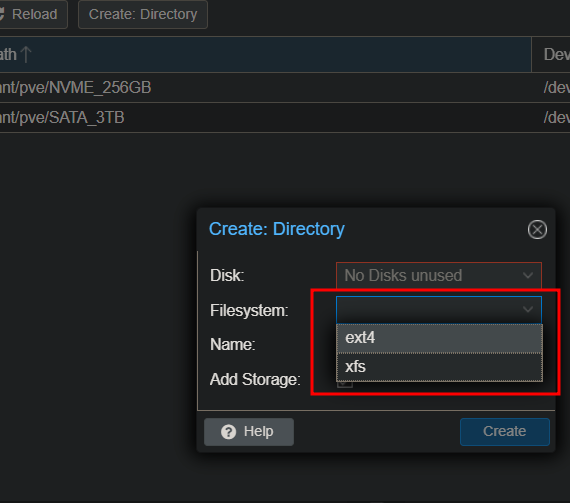
If you see below you can add directories to your physical disks in the GUI:
Note: It also gives the option for ext4 or xfs for formatting and I chose ext4.
Below you will see that you can go to the container “resources” and add the mountpoints there. You don’t need the CLI for this either:
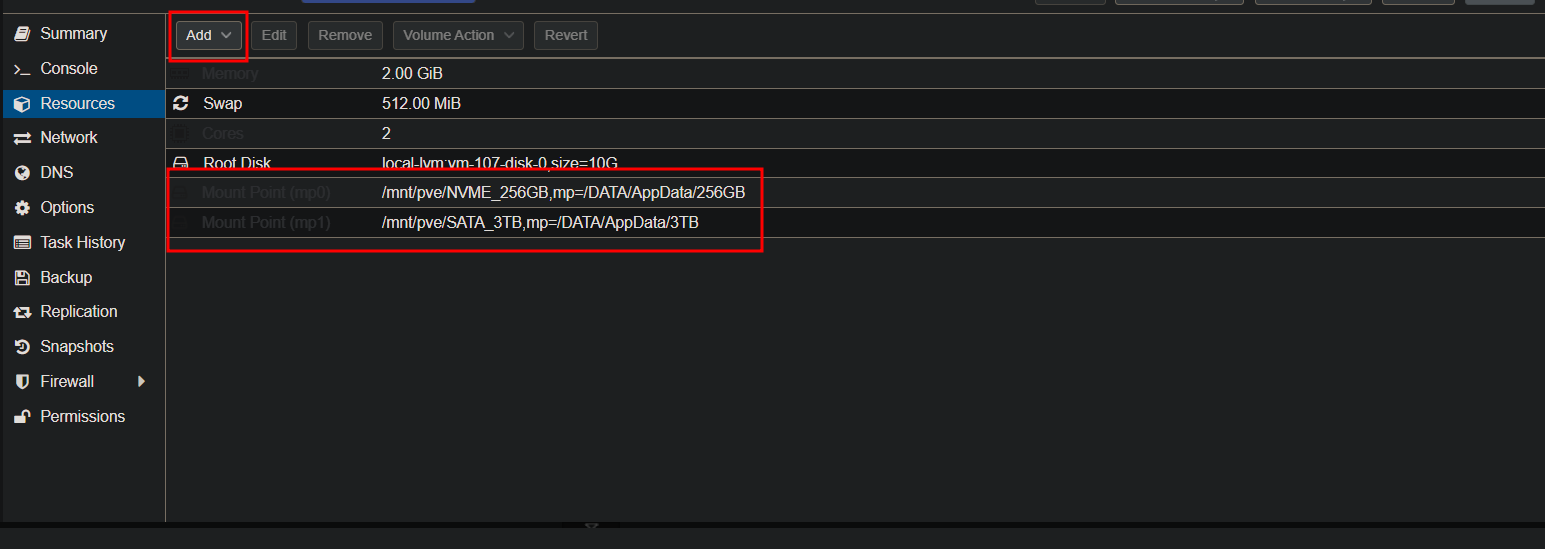
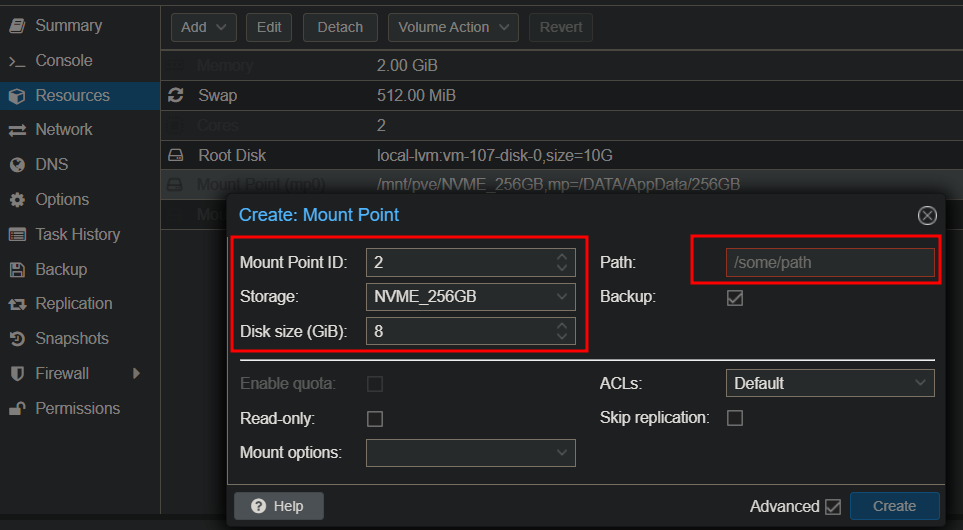
For someone who is a visual learner, this was very helpful and better to understand in my experience.